Project NFM-100
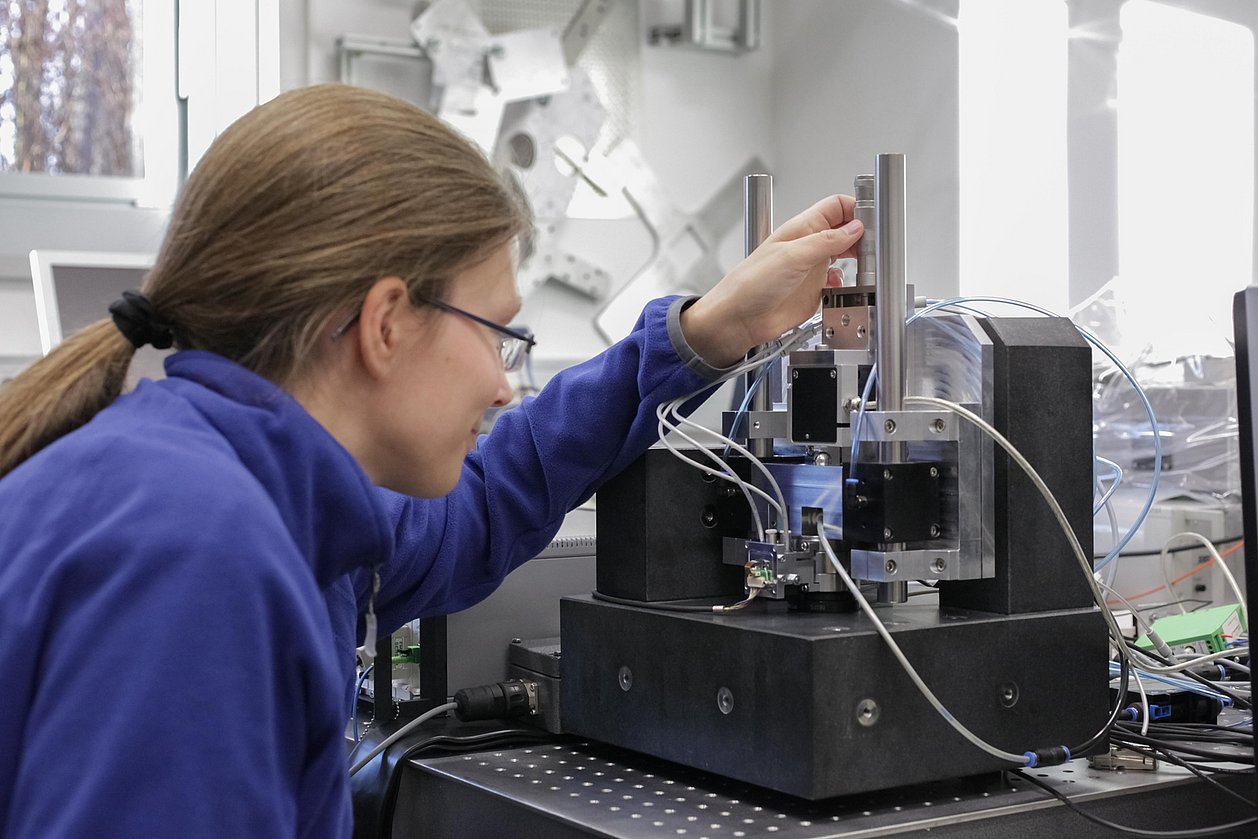
For fundamental research on nanometrology and nanofabrication at Ilmenau TU, the nanofabrication machine NFM-100 was realised as a system which enables the scanning of surfaces (AFM) as well as the processing by field emission scanning probe lithography for the first time in an xy-travel range of Ø100 mm.
The inspection of optical precision components, wafers and masks, surface scans on an atomic level with atomic force microscopy (AFM), tip-based nanofabrication with active microcantilevers – these and many other high-tech industry technologies, even beyond semiconductor processing, rely on high-precision positioning systems to enable nanometre-level measurement, but also nanofabrication, i.e. manipulation on this scale. It is becoming increasingly necessary to be able to use such technology not only in the range of a few micrometres, but also for large measurement objects or at wafer level, in the range of a hundred millimetres or more.
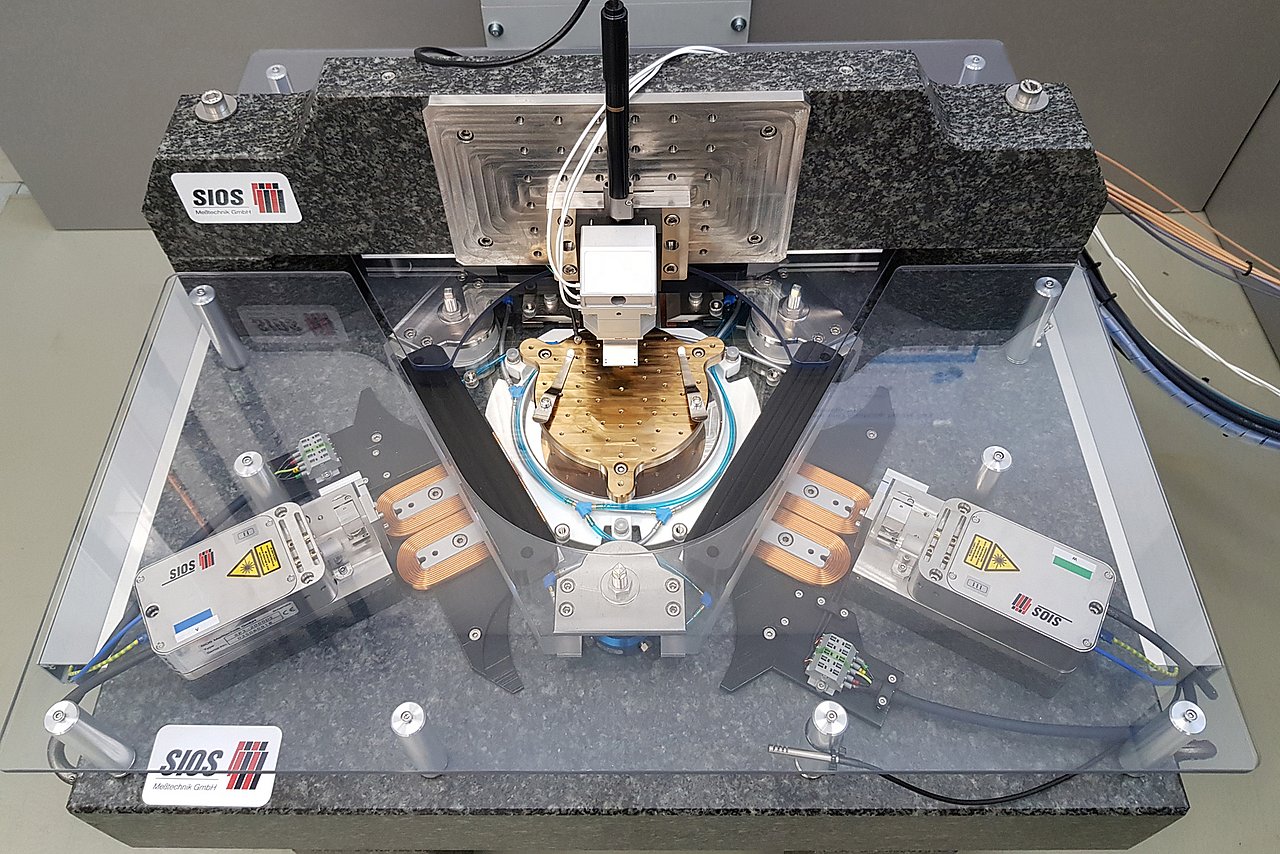
For fundamental research on nanometrology and nanofabrication at Ilmenau TU, the nanofabrication machine NFM-100 was realised as a system which enables the scanning of surfaces (AFM) as well as the processing by field emission scanning probe lithography for the first time in an xy-travel range of Ø100 mm, see Figure 1.
IMMS know-how for precision positioning
For the development and realisation of the NFM-100 system under the leadership of SIOS GmbH, IMMS was able to contribute its know-how in the field of air-guided precision drives, in particular the realisation of nanopositioning systems for large travel ranges, which results not least from many years of joint research with Technische Universität Ilmenau on nanopositioning and nanomeasuring machines. The NFM-100’s positioning system consists of an integrated 3D direct drive developed by IMMS, in which the drive forces act without contact on an aerostatically planar guided quartz glass slider. The displacement and yaw of the slider are measured by ultra-stable differential interferometers from SIOS GmbH, also contact-free and with picometre resolution. With this low-noise and highly accurate feedback, a closed-loop control for x, y and φz is realised via the real-time control. In addition to the development and implementation of the integrated direct drive and its integration into the overall system, IMMS also contributed to the programming of the real-time control and in particular the development, implementation and fine-tuning of the control algorithms. An AFM measuring head from nano analytik GmbH is used as probing system.
Long-range AFM scans and 100-picometre steps possible
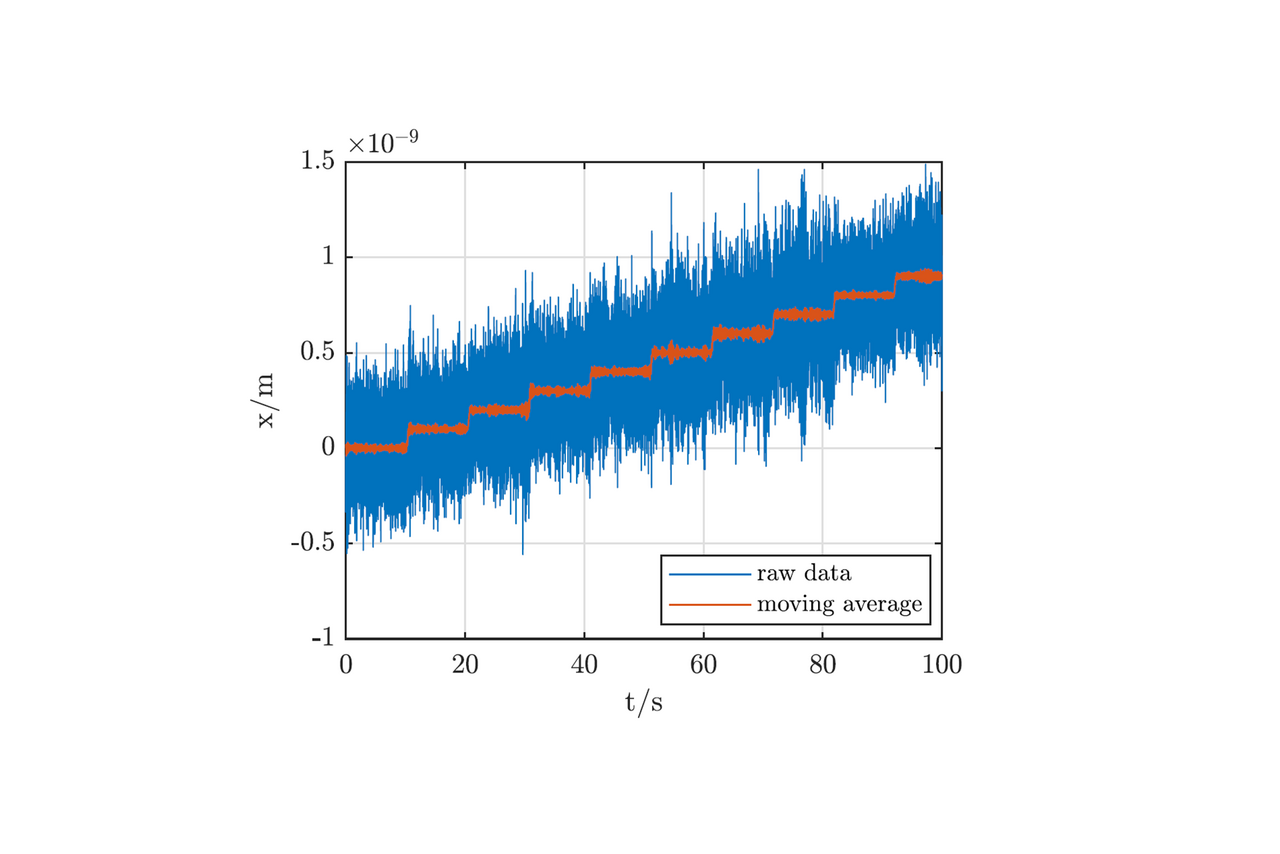
As a result, the NFM-100 system is a completely new type of device that opens up new fields of application for AFM technology thanks to its large working range. The positioning system achieves sub-nanometre position stability and enables positioning steps of, for example, 100 picometres, see Figure 2.
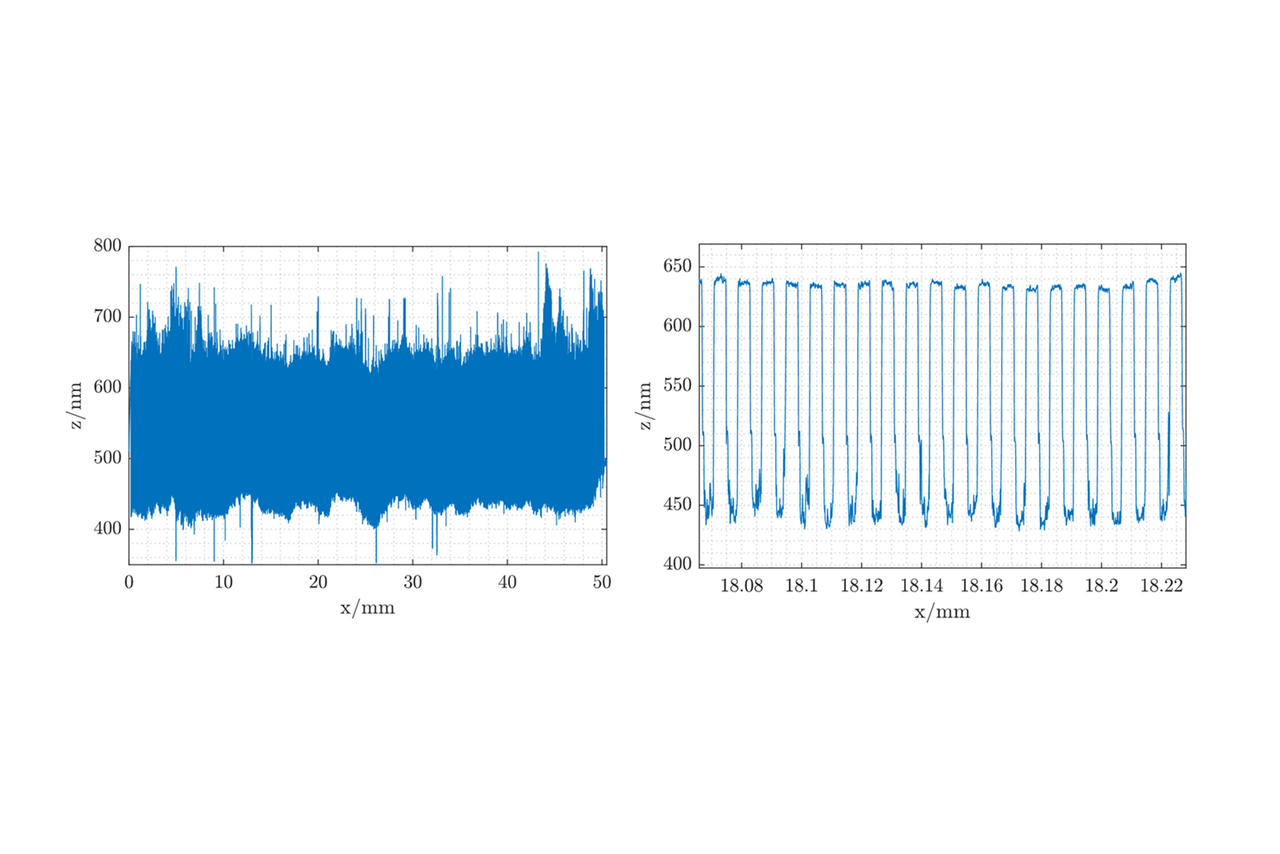
With these outstanding properties, the NFM-100 is being used very successfully for scientific work at TU Ilmenau in the field of nanofabrication. In 2021, for example, it was possible to achieve continuous AFM scans over 50 mm without the usual stitching, i.e. without the combination of overlapping partial images, see Figure 3.
Perspective also with vertical adjustment
The positioning system on which the NFM-100 is based can also be equipped with other sensors as a probing or manipulation system, which makes it possible to address further measuring or processing technologies at the nanometre level. In the above configuration, the positioning system is already available as a modular platform via SIOS GmbH.
However, the underlying scalable machine approach enables the implementation of a z adjustment of up to 10 mm in addition to larger xy travel ranges. For this purpose, suitable lifting modules were developed at IMMS as vertical nanopositioners with integrated weight compensation [4], [5].
Acronym / Name:
NFM-100 / Planar nanopositioning system enables atomic force microscopy in new qualityDuration:2018 – 2019
Application:
|Inspection of optical precision components| Inspection of wafers and masks| Surface scans on an atomic level with atomic force microscopy (AFM)| Tip-based nanofabrication with active microcantileversResearch field:Magnetic 6D-direct drives with nanometre precision
Partner
Related content
Tip-based nanofabrication below 40 nm combined with a nanopositioning machine with a movement range of Ø100 mm
Jaqueline Stauffenberg1. Michael Reibe1. Anja Krötschl2. Christoph Reuter2. Ingo Ortlepp1,2. Denis Dontsov3. Steffen Hesse4. Ivo W. Rangelow1,5. Steffen Strehle2. Eberhard Manske1.Micro and Nano Engineering, Volume 19, 2023, 100201, ISSN 2590-0072, DOI: doi.org/10.1016/j.mne.2023.100201
1Institute of Process Measurement and Sensor Technology, Production and Precision Measurement Technology Group, Technische Universität Ilmenau, Gustav-Kirchhoff-Straße 1, Ilmenau 98693, Thuringia, Germany. 2Institute of Micro- and Nanotechnologies, Microsystems Technology Group, Technische Universität Ilmenau, Max-Planck-Ring 12, Ilmenau 98693, Thuringia, Germany. 3SIOS Meßtechnik GmbH, Am Vogelherd 46, Ilmenau 98693, Thuringia, Germany. 4IMMS Institut für Mikroelektronik- und Mechatronik-Systeme gemeinnützige GmbH, 98693 Ilmenau, Germany. 5nano analytik GmbH, Ehrenbergstraße 3, Ilmenau 98693, Thuringia, Germany.
Contact
Contact
Dr.-Ing. Ludwig Herzog
Head of Mechatronics
ludwig.herzog(at)imms.de+49 (0) 3677 874 93 60
Dr. Ludwig Herzog will provide detail on our research on magnetic 6D direct drives with nm precision for the nm measurement and structuring of objects. He supports you with services for the development of mechatronic systems, for simulation, design and test of MEMS as well as for finite element modelling (FEM) and simulation.



![[Translate to English:] [Translate to English:]](/fileadmin/_processed_/9/0/csm_20200731_IMG_2732_K4PNP-INPOS_SG_1920x1280_7c70c69f8a.jpg)
